
I am new around here (been lurking for a while)One of my favorite things to do is Jerky and up until now have been very frustrated with my CS smoker trying to make jerky. These are great smokers for any type of meat that you don't want to be dry, like prime rib, turkey, etc. In fact the best smoked turkey I have ever tasted was my trial run with this smoker this year. Hands down bar none THE BEST!!

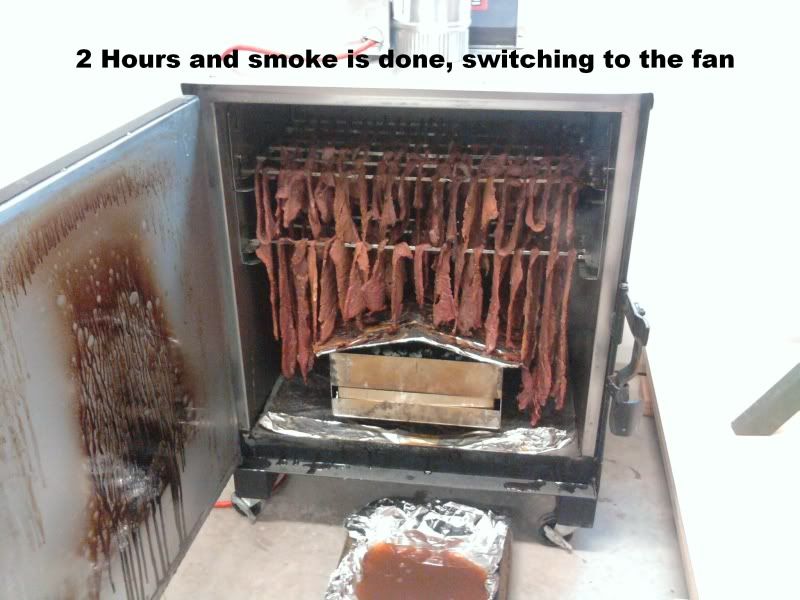
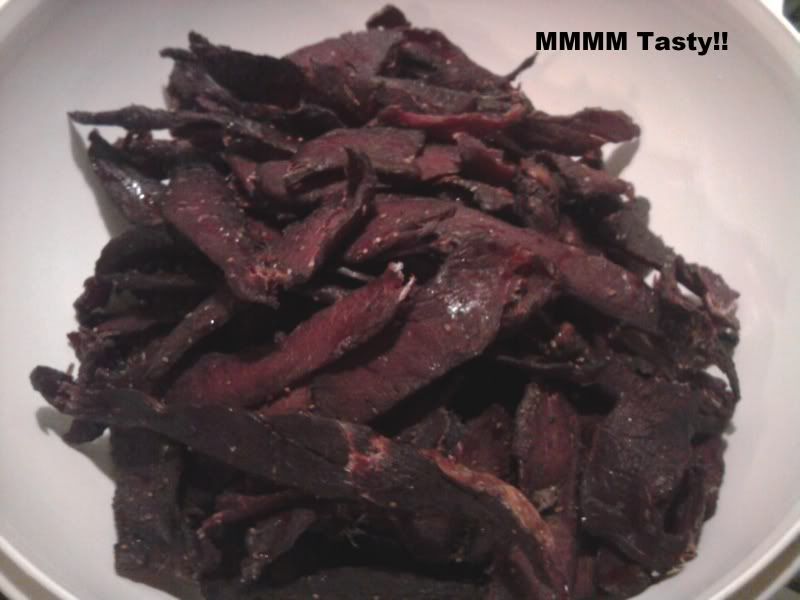
Which brings me to this post. Jerky is DRIED MEAT!!
I have read hundreds of posts here and on other sites trying to learn about Jerky and I know there are a lot of different ways to do it. I don't want to offend any one here and I am by no means an expert, I just want to share what I know and how I came to this knowledge.

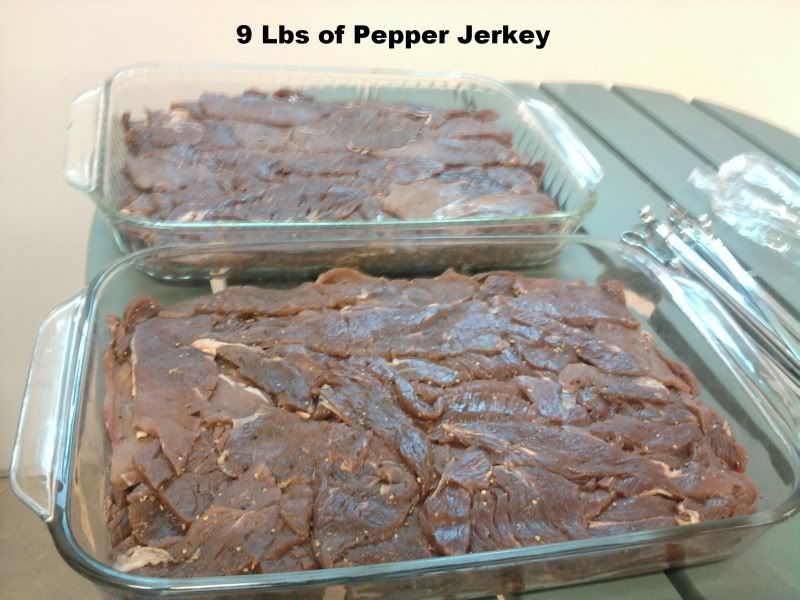
To start off with, most of my batches run about 10 lbs of meat. (I see that most here do about half that) But I can manage to stuff 10 lbs worth in my Smokette, they say bigger is better right?? Anyway, batch after batch was coming out marginal at best. Embarrassingly I made better jerky in my big chief smoker than I could make with this.
I see a lot of people running temps from 180 to over 200, every thing I have learned about jerky is that if it is over 150 you are cooking NOT drying it, which makes sense. I have tried 140 to 200 and about the only difference what how fast it got "done". At 140-150 my 10 lb batch would take 18-24 hrs, at 200 it would take 6-8 hrs. The meat would go from red to gray, to dark brown almost black. I tried opening the door a few times to let the moisture out and check the meat only to find water running down the sides of the smoker and dripping off the door. Threw all these trials I never had a batch of jerky that was good. By good I mean the kind that you just cant stay out of each piece leaves you wanting more! It was ok for a snack but a bag would last on the counter for a few days before we finished it off. What I am after is the kind that once the bag is open, its constantly calling your name to come back for more.
Anyway I started trying to come up with ways to dry the meat instead of steam all the flavor out if it (which is what this smoker is good at). Strangely after I had all of what I am about to explain here figured out and done, I read a post about how Smoken Tex (the not so cheap CS knock off) came up with a "Jerky dryer attachment" But HOLY COW they want $100 for it!
More on this Dryer see post :
http://forum.cookshack.com/eve...21013824/m/891104094

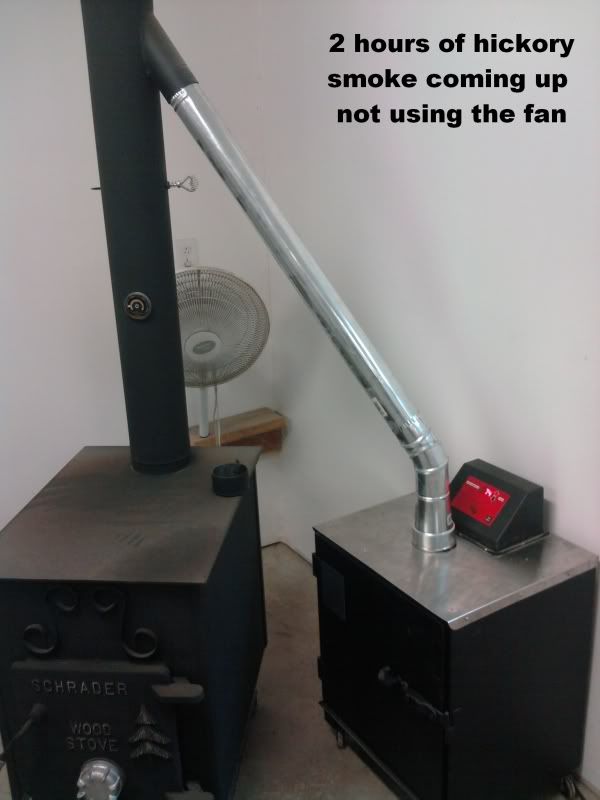
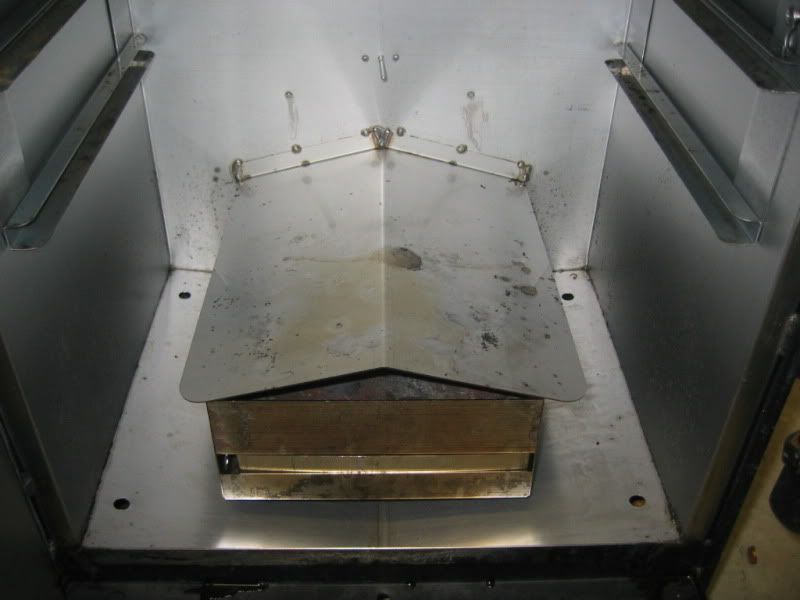
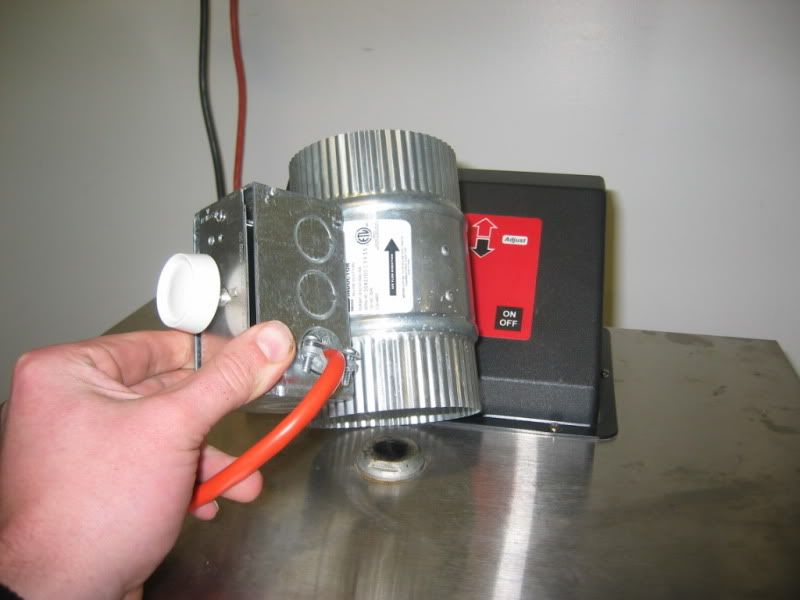
In order to dry the meat, you need air flow to remove the moisture, a lot more than the natural convection that happens threw the small vent holes at the top and bottom. A few pictures are worth a thousand words here, Here is what I started with and I will explain what not to do as we go.

To start off with I drilled 4 extra holes in the bottom of the smoker (NOT NEEDED DONT DO THIS)


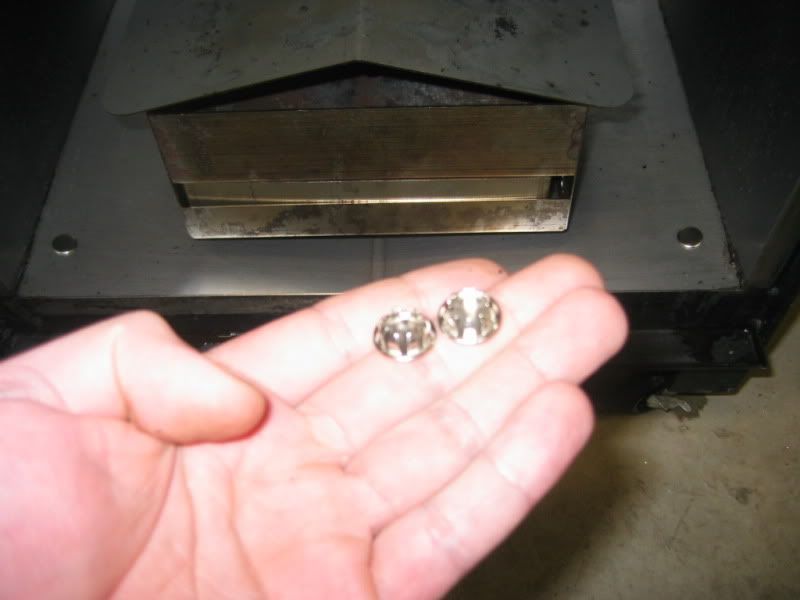
Planning on using these metal plugs to cap the holes off when I want to return to normal smoking mode. Again SKIP THIS STEP IT IS NOT NEEDED.


I found a 4" inline duct fan it is designed to help increase air flow in heating ducts that are a long ways away from the furnace in a house. These can be found at Home Depot or probably most other home improvement stores Google DB204 to find it. Next I bought a light dimmer switch thinking it would help me control the fan speed and make it adjustable (DON'T WASTE THE MONEY ON A SWITCH LIKE THIS ITS NOT WORTH IT) it doesn't give you much control any way. In reality a simple light switch or even no switch at all would be just fine. These parts along with the male end of an extension cord is all that is needed. This set up costs about $30 I paid more with the extra not needed items.
Link to fan: http://www.smarthome.com/3016/...uct-Fan-DB204/p.aspx


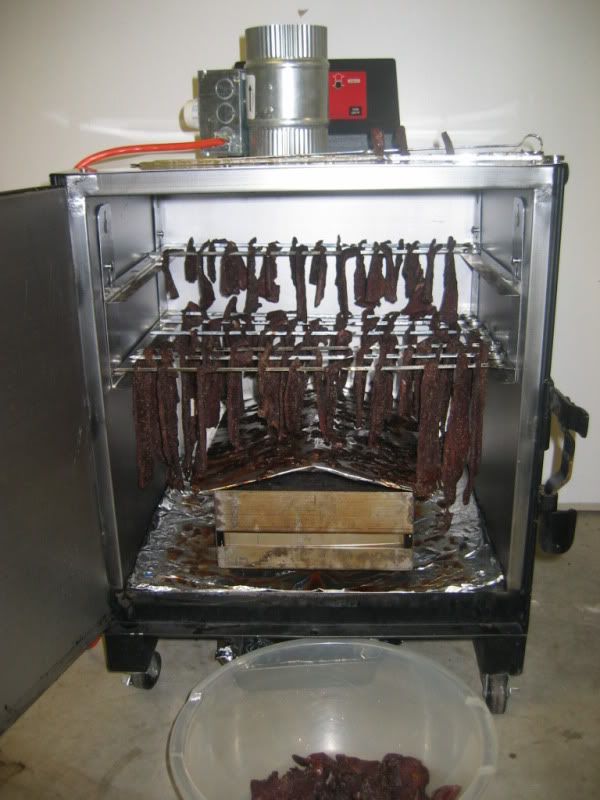
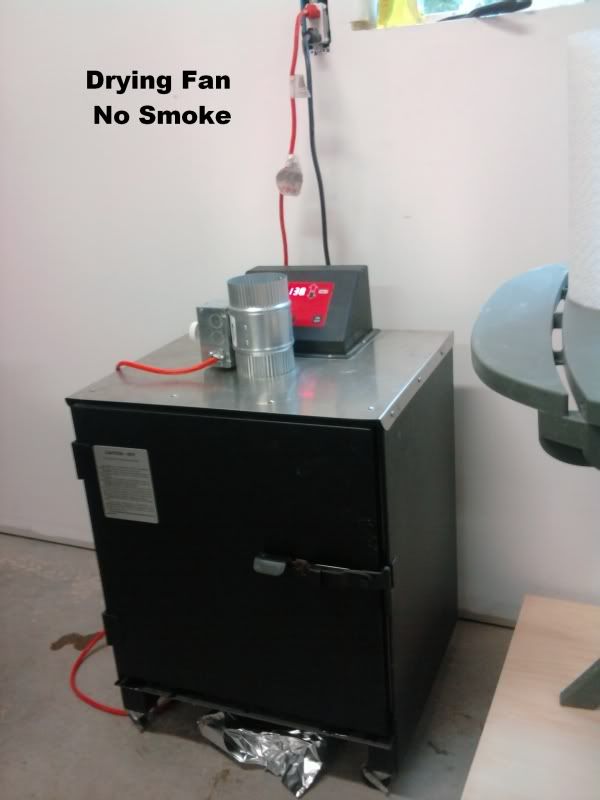
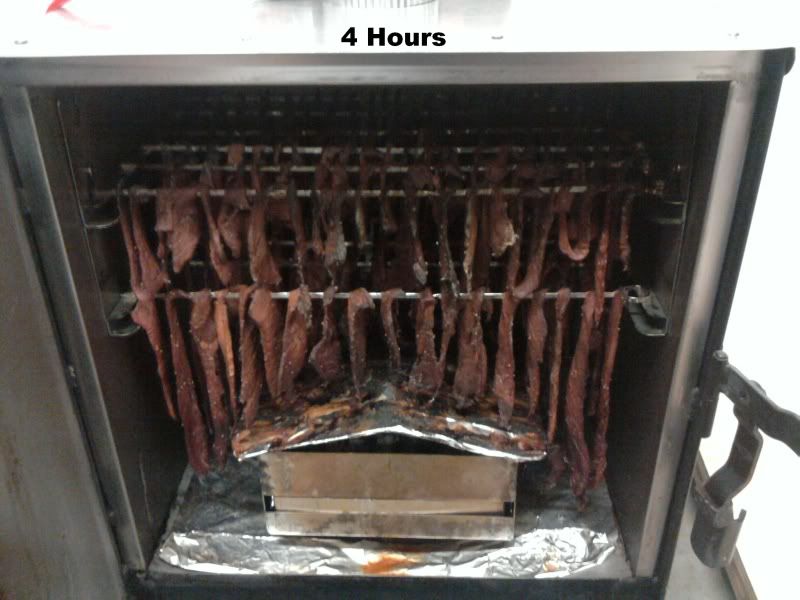
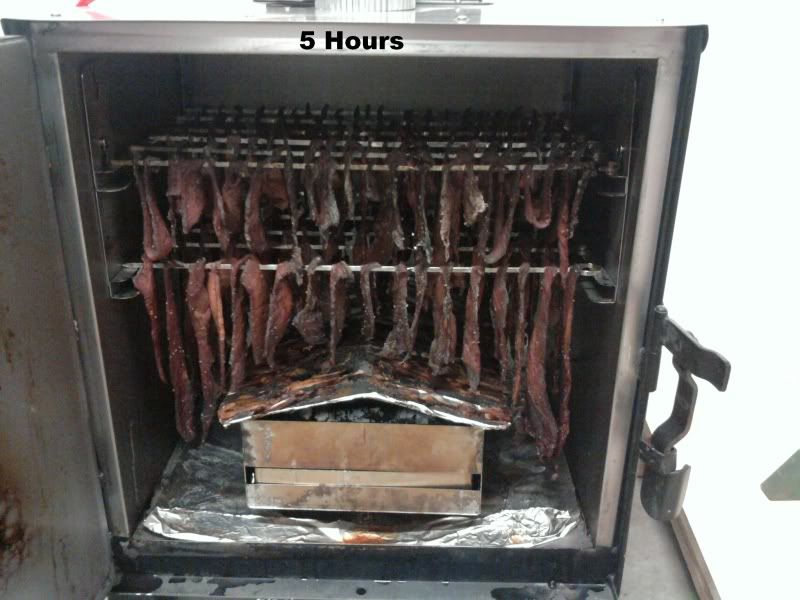
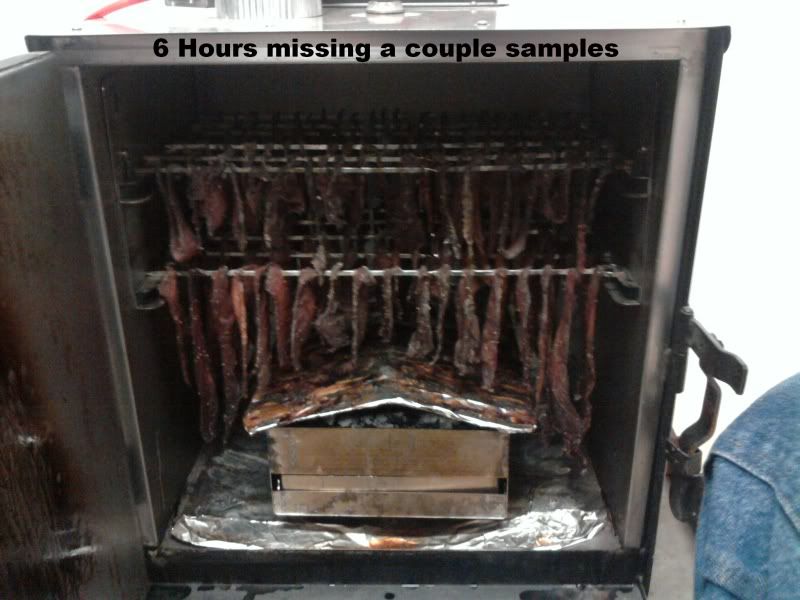
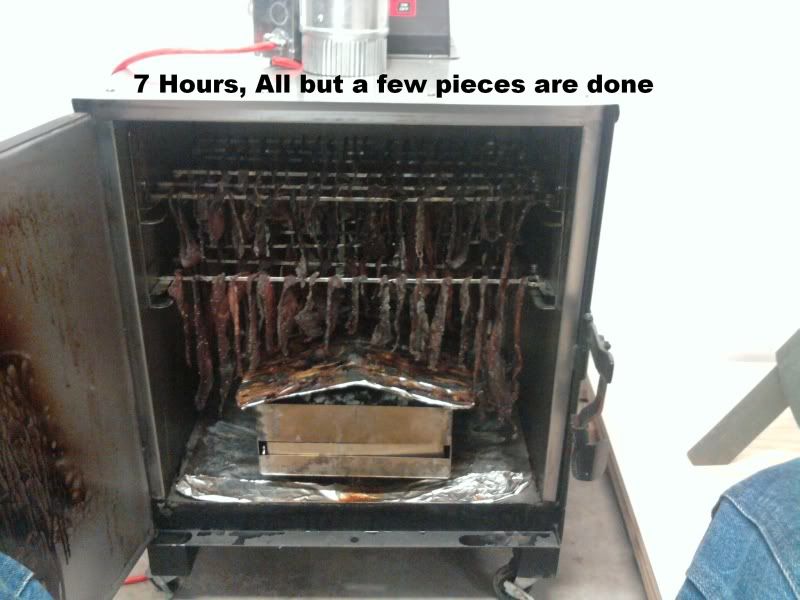
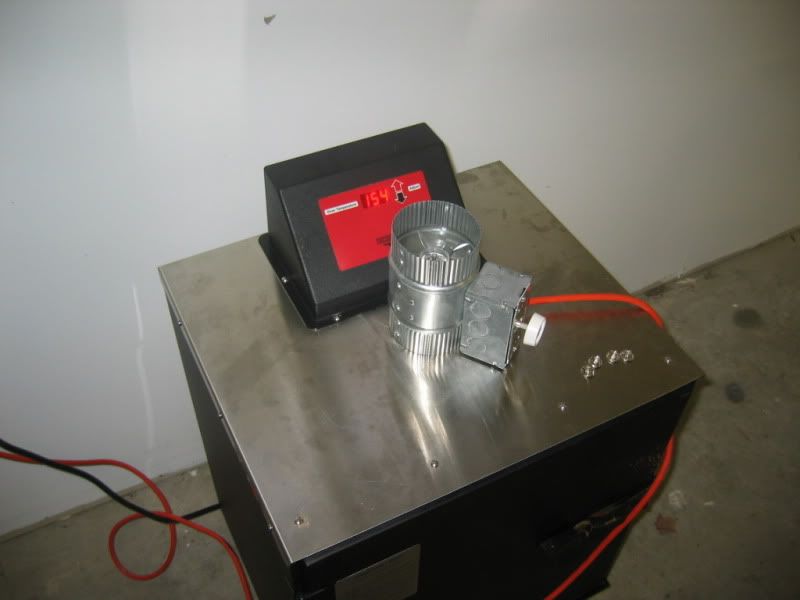
I set the smoker at 150 and after it reached temperature I set the fan over the exhaust hole, with all for new holes open the smoker would drop to 138 and never recover it would cycle the element and never climb back up to temperature, I plugged 2 of the holes, it would climb back up, but it was slow getting there. I plugged all of the holes off and it easily maintained the 150 temp that I was looking for but I was worried that it would not be enough air flow to work. I checked the progress every hour or so and never had any moisture on the walls or the door, never had any big puffs of steam when I opened the door, it was working
GREAT!


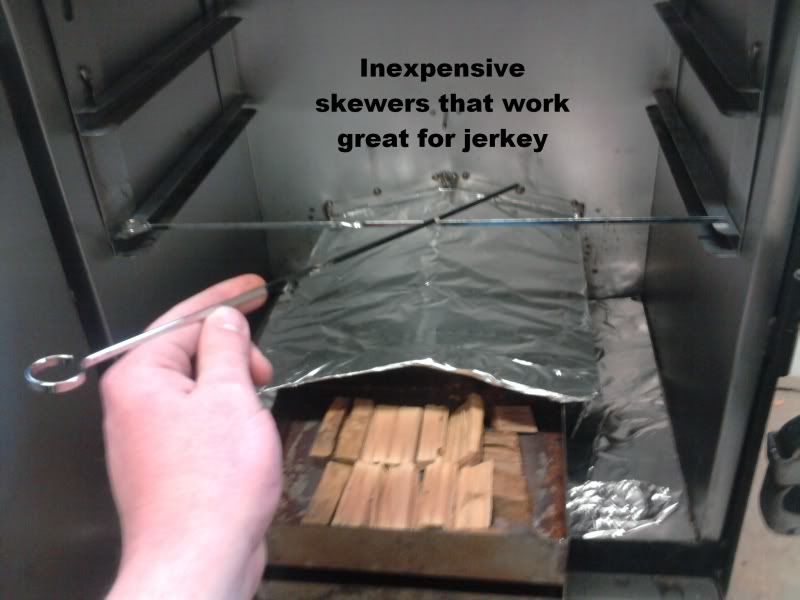
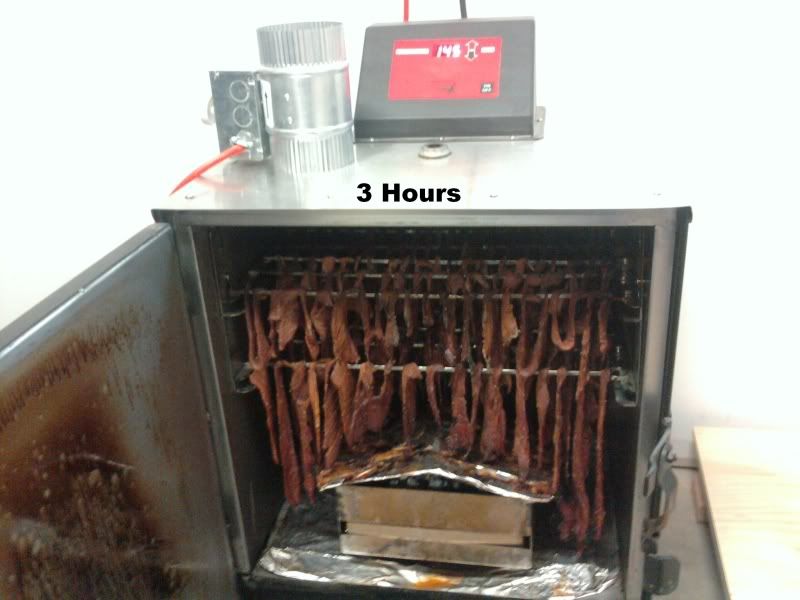
Here is what I started with, I found these 18" metal skewers at ACE hardware they are a perfect fit and will hold a lot of weight. I can get the brand name if any one would like.


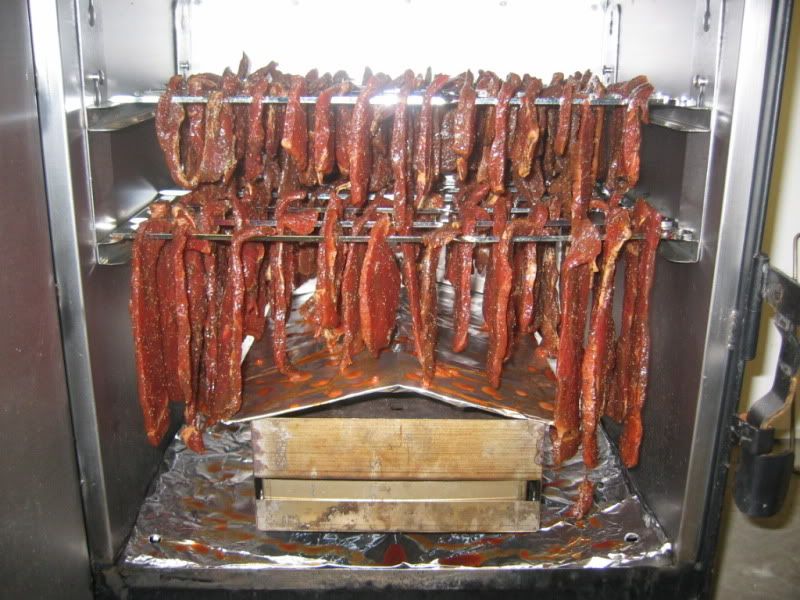
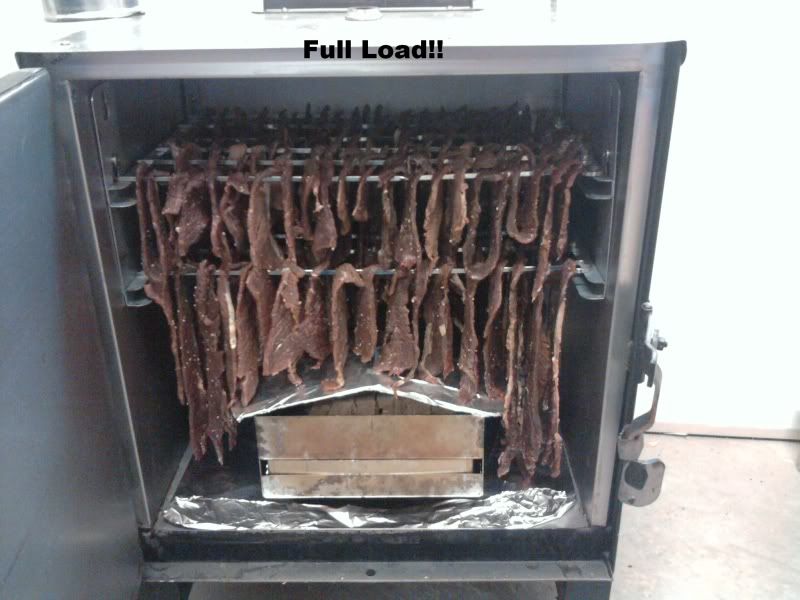
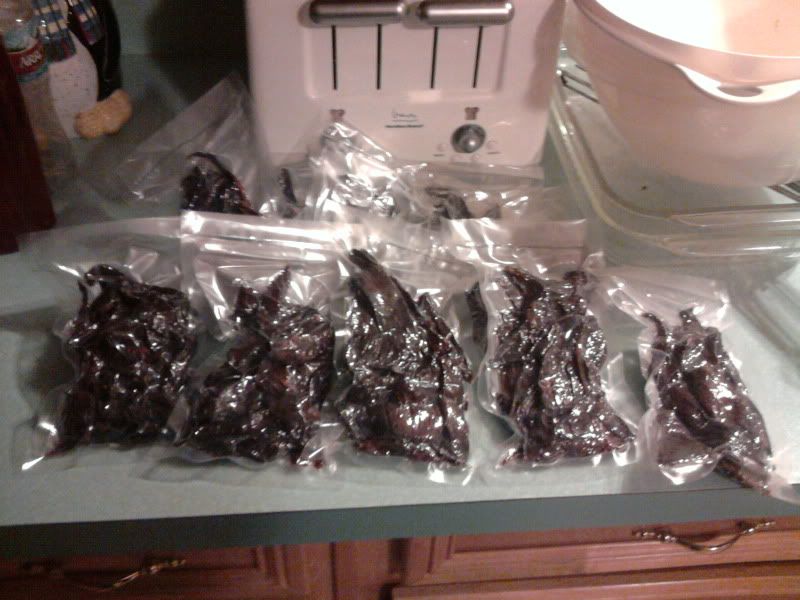
This is 10 lbs after about 8 hrs at 150, BTW I didnt use any smoke on these, I wanted to get a base line for what my cure tastes like to start with and then add smoke to the next batch.
Last edited {1}
Original Post

Replies sorted oldest to newest

I was getting nervous about loosing that post it was getting very long. Long story short if you want to make great jerky (not just good jerky) Drop your temps to the 150 range and and get the air moving. There are a few things I want to point out though. If you are doing this with meat that doesn't have a cure you need to be careful because you are not getting it up to safe temps with this method. But then again if you are doing jerky in a dehydrator you are not getting that high either, it is the lack of moisture that helps preserve it. All I am saying is use caution.

The other thing I see a lot of people ask is how long will it take?? Plan on making a day of it. Times will vary for many reasons, how dry the meat is when you start, some times different cuts of meat will take longer than others, how much you are drying at one time, 5 lbs will go a lot faster than 10lbs, your location, if you live in Arizona and your humidity is 10% it will dry a lot faster than if you live where I do (West Coast) where the humidity is 90% this time of year and 50-80% in the summer. There are so many factors that play a part in the drying process it is impossible to have a cut and dry (sorry for the pun) "this much will take this long" answer.

I am so excited to have finally figured out the answer to my problems!! Hope this helps the others out there enjoy this fun hobby.

For those of you who will ask......yes I cleaned my smoker before starting this project, I wanted to start from scratch, I didn't want any stray flavors (mostly the possibility of a bad flavor) from an unknown mistake tainting the results.
Last edited by Former Member
Great report. Thanks.

Comment. Even though you posted it, I want to point out, don't drill the holes, there is no need.

Question. You really don't mention smoke. I'm worried that if you're moving too much air out you actually pulling the smoke out with it.

I'd think a two step process would be in order.

1. Smoke
2. Dry

What do you think?
Nice idea. Very clever. Good solution to your situation.

My last several batches of jerky have turned out as good or better than store bought using the GLH method at 180*, and I'm trying to figure out why I don't feel the need to add a blower to my jerky making. I think maybe it may have to do with a couple things.

First, I only smoke/dry 6 lbs of meat at a time. So I'm adding basically half the moisture to the smoker that you are with 10 lbs. I get moisture inside at the beginning of the smoke, but not the volume you've experienced. It's gone by the end of the smoke so drying is occurring.

Secondly and probably importantly, the humidity where I live is only about 15% (except Nov-Feb rainy season). So the smoker isn't pulling in real humid air like you're experiencing in Washington. Actually, the dry air pulled in around here probably actually helps the drying process with the little heated movement the smoker provides. Never thought about it until you mentioned it.

Again, I think you've come up with a great idea to handle your situation. Welcome to the forum. Look forward to more picture posts on some of your future smokes.
quote:
Originally posted by SmokinOkie:
Great report. Thanks.

Comment. Even though you posted it, I want to point out, don't drill the holes, there is no need.

Question. You really don't mention smoke. I'm worried that if you're moving too much air out you actually pulling the smoke out with it.

I'd think a two step process would be in order.

1. Smoke
2. Dry

What do you think?


YES DO NOT DRILL THE HOLES!!!!!!!!!!!!!!
The reason I posted that information was because I didn't want any one else to be like me, thinking it might be a good idea. I tried it, there is no need for any one else to experiment with it. Truth is I didn't really want to drill holes in such an expensive unit but I like to experiment and figure out how things work and why.

As for adding smoke to the equation my thought was exactly what you mentioned, add smoke first part (probably start out with about 2 hrs of smoke)NOT USING THE FAN and then remove what ever wood is left so I don't inadvertently start a fire by drawing too much oxygen into the unit and creating a draft across the coals that will turn the smoldering wood into flaming wood.
Simply put:
Wood and smoke = NO FAN
No wood and smoke = USE THE FAN

I don't want some one burning up their smoker!

I will add to this post as I go with more information.
quote:
Originally posted by MISTER MIKE:
Great post. Trying to work on jerky in the FEC. Love Woodland, what ever happened to Whimpy's drive-in??


Mad Starbucks decided they needed to sell more coffee than what they were selling in the Safeway right next door. At least we have a Papa Murphys now though. I would still rather have Whimpys back.
My next installment on my jerky quest. I started with the same bottom round roast as the batch described in the above posts, I sliced it a little thinner that before but I am not as happy with the outcome. For my liking 1/4 in thick is going to be my target thickness. In my next batch I will be trying a different cut of meat as well, I usually wait until the store has decent looking meat on sale I have been getting it for 1.99/lb. When I purchased these rounds I also got some Top round/London Broil for the same price which I ground up for hamburger, hind site tells me I should have used this for jerky and that will be what I try next. Here are the photos and description from start to finish.
All vacuum sealed and ready for storage, not that it ever lasts long enough to store for months, but I have found that vacuum sealing like this evens out the moisture in all the pieces the crispy ends (if you over do it just a little bit) soften back up. OK I am much happier with the outcome on day 2, that is one other thing I wanted to mention, after the meat "rests" for a day or two it will be a lot better than when it is fresh our the smoker.
Last edited by Former Member
That looks great. Nice job. I've been using London Broil for my jerky, and I like the results I've gotten with that cut. I think you may wind up liking it also once you give it a try.

The most meat I've been able to squeeze in is 6 lbs. Looks like you were able to get in 12 skewers on two levels. Is that correct? I've only gone with 4 skewers and longer cuts of meat. I think you've just helped me figure out how to get more output from my Elite. Thanks for the postings.
Great post.

One caution for anyone setting up like this. Because of the small vent hole CS doesn't recommend putting a vent directly on the CS. It will cause airflow issues. They've always recommend you place it with a gap a few inches above the vent.

Sorry, have to provide the CS info.

GREAT POST, keep it coming. Looking good.

Smokin'
have to agree with those CS recommendations. It is not a good idea to tie a CS vent like this into a wood or gas heater vent. If you want to do an indoor setup there needs to be an adeqate air gap so as not to interfere with the design operation of your CS and the vent should have a properly regulated in-line exhaust fan or one on the roof. The end result is much like an exhaust hood in any commercial kitchen. Always check wuth your home insurance carrier.
quote:
Originally posted by SmokinOkie:
Great post.

One caution for anyone setting up like this. Because of the small vent hole CS doesn't recommend putting a vent directly on the CS. It will cause airflow issues. They've always recommend you place it with a gap a few inches above the vent.

Sorry, have to provide the CS info. <- Dont be sorry....this is all about learning!

GREAT POST, keep it coming. Looking good.

Smokin'


Point noted I will do it a bit differently next time, it is not as sealed as it looks, I have tested and monitored it closely and with or without a fire in the fire place it draws very well (but if there were ever a down draft situation it would not be good), might be a different story in the summer time with the warmer ambient air temps but then in the summer time it wont need to be inside. Just to clarify "inside" this is not inside my house this is out in my shop. I wouldn't consider doing something like this inside my home. I have seen pictures where people have and something about that just doesn't seem right about that.
quote:
Originally posted by Pags:
That looks great. Nice job. I've been using London Broil for my jerky, and I like the results I've gotten with that cut. I think you may wind up liking it also once you give it a try.

The most meat I've been able to squeeze in is 6 lbs. Looks like you were able to get in 12 skewers on two levels. Is that correct? I've only gone with 4 skewers and longer cuts of meat. I think you've just helped me figure out how to get more output from my Elite. Thanks for the postings.


In this batch I got 6 on top and 6 on the bottom In the batch from the first part of this post I only got 5 top and bottom, it all depends on the cuts of meat and how wide they are. Loading this heavy is time consuming, it took me almost an hour to get it all in there, one other thing I was going to mention and didn't was having it all laying flat in pans to begin with is a lot better than having it all jumbled up in a bowl. With all the pieces laying flat they are nice and straight, when they are folded and bent to begin with it is extremely hard to get them to hang straight and not touch the rest of the pieces.

Add Reply

×
×
×
×
Link copied to your clipboard.
×