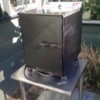
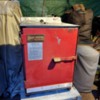
After nearly 13 years, my SM008 is showing its age. I had to reconnect the wiring to the heating element last year, but it's been chugging along since then.

I've decided to do a little (long overdue) maintenance.

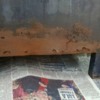
Currently, I'm working on sanding off some of the rust on the sides. After some scraping and sanding, I realized the rust has gone all the way through the outer skin in a few places. A picture is attached. I'm thinking I'll just fill in the holes with epoxy or liquid metal and sand it flat. Does anyone have any concerns about that repair?

Second issue is that I had to remove the top to get at the rust under it, and I noticed a problem with the three small stainless steel screws along the front edge, about 1.5 inches back from the edge. Whatever these screws attached to is gone; there is just a round hole under each screw with a pocket of rust in the insulation under the hole.

Does anyone know what these screws were supposed to fit into, and what function the screws were designed to serve?

Finally, I need new rubber feet. Does anyone have a source for them?
Attachments

Images (1)
  • smoker_side_rust_small
Original Post

Replies sorted oldest to newest

I finished the refurb. It should last at least another 2-3 years. I hope other owners can benefit from a few things I learned:

1. The stock vent assembly is very hard to disassemble, but you can't remove the top on this model unless you take the vent apart. From the factory, the top and bottom serve as "nuts" securing the vent pipe through the roof, but the flange "nuts" provide a thin flat gripping surface, and plenty of grime and grease. I got mine off with giant vice grips and a pipe wrench, but there was a lot of corrosion in the pipe and cosmetic damage to the flanges in the removal process. I replaced the stock 1/2" assembly with two 3/4" stainless locknuts and a stainless 3/4 inch pipe 1 3/8 inch long. Fits perfectly, looks better, cost only $14 (including shipping) and it will be easier to service going forward. The larger diameter on the vent should be an easy adjustment next time I smoke.

2. I fixed the rusted out areas on the bottom right panel with JB Weld high temp adhesive. That is probably overkill, because I don't think that area gets very hot through the insulation, but it seems pretty durable.

3. The metal feet on this model are not a good design. The square configuration with a single moisture release hole in the bottom is a disaster because the moisture release hole is covered by the rubber foot. Water accumulates in the bottom of the cover and rusts out the feet. I got a new clear plastic cover that has a porous fiber bottom. It should reduce moisture accumulation, especially in the SoCal climate.

4. I spray painted my smoker with a rustoleum satin black high heat paint supposedly designed for barbeques. It matched the stock paint very well, and I hope it discourages the rust from coming back.

5. Overall lesson learned is to buy the stainless version. Small increase in cost produces significant long term savings in maintenance. Still, I bought this rig second hand, and it has more than lived up to my expectations.
Thanks Jay. I was especially pleased with how the new vent turned out. I've attached a picture. It looks sleaker to me, and it will be much easier to maintain. If cookshack sold new decals for the control panel the smoker would really look spiffy!

I got the stainless table a few years ago on ebay. It looks like there are similar tables available now. I got a great deal around $40, but one of the leveling feet was damaged in shipment, so they refunded my entire purchase price and sent me a new foot, giving me a free smoker table! One of my better ebay experiences, so long as you count restoration as recreation.

Attachments

Images (1)
  • smoker_vent_small
Last edited by shermanoakssmoker

I got the same model that's about 19 years old now and was working great right up to last week. I couldn't control the temp.It would go up to my setting then drop down almost 50 degrees and then right back up again until I couldn't control it at all when the temp went up to 277. I'm hoping that I can get a new control so I can regulate it again. She's been great all these years and I just bought a set of new stainless steel racks for her.  Nice job by the way on ur refurb.


I got an 008 that was in the same shape, paid $50 for it.  I scarfed some 2 in x 3/4in x 1/16 thick angle aluminum on the sides and the door using self tapping screws. Sealed the side and bottom edges with high temp silicone engine gasket maker.  I didn't think anything else would cover the 1/2-3/4 in rusted opening on the sides.  The angle aluminum worked really well
Also had to replace the thermostat. Used one from Smokin Tex.  Only difference is I put the bulb on standoffs instead of against the wall like the original.

My screw holes on the top plate were also rusted out, drilled some new holes and used more of the self tapping screws there too. Then I put screws one size bigger in the old holes so they would be filled and not leak.


Attachments

Images (1)
  • Cookshack 008
Last edited by LonzinomakerCS

Add Reply

Post
×
×
×
×
Link copied to your clipboard.
×