
What about a sticky post for everyone to post their Smoker setup???????

I would be very interested in seeing what people are using and how they constructed their area.

Thoughts??? SmokinOkie, are you still the head guy on this forum???

Mine is a temp setup until the deck is built this summer, but it works.

Attachments

Images (1)
  • DSCN2582
Last edited {1}
Original Post

Replies sorted oldest to newest

quote:
Originally posted by dmaclaren:
Thoughts??? SmokinOkie, are you still the head guy on this forum???


Nah, I'm still the head Dishwasher and I do take out the trash when needed Smiler

I made it a sticky, thanks for the suggestion.

If needed, anyone can email me the photo and I'll make it available to everyone or you can post it via the Forum process to add a photo to your posts.

Smokin'
Here's mine, and don't ask me how I built it, because I can't remember!

It works great, though. How about that nice green colored pine? I got the tin of stain out of the clearance bin at Home Depot.

The only problem with my design is that marauding animals can pull the drip pan out and lick it dry (after making a big mess, of course). I have to remember to remove it if it is replete with the likker.

Attachments

Images (1)
  • smokette


Sam's Club Online:
24 in. x 30 in. x 34 in. Stainless Steel #984022 $71.62

24 in. x 24 in. x 34 in. Stainless Steel 984015 $63.63

items subtotal $135.25

shipping subtotal $76.00

tax subtotal $16.18

order total $227.43

Cut 24x24 table legs to your desired height.
Not a bad price for SS work tables (galv. legs and bottom shelf)
quote:
Originally posted by GeiyserQ:
Nice set- up bayside.


Man there is going to be trouble now! Big Grin I can't believe you didn't tell us about this site! Eeker By the way there are pictures of smokers here but they have electric chords trailing off them. What's that all about? Wink
I'd like to post some pictures of mine but the weeds have overgrown them! Eeker
I live in Nebraska where the weather can present a challenge! I'm lucky enough to have a "shed". My "shed" is a detached two stall garage. It's got a fridge, phone, radio and color TV (with cable). I don't want to miss any Husker games, so the TV was mandatory. The shed now is home to my Cookshack 009. I bought the unit in late April and have already run 16 batches of "Q"!

http://i5.photobucket.com/albums/y198/Husker22/009.jpg
Here's my setup. I got a Cookshack Model 15 H/S shell from a junkyard, and my son and I rebuilt it. The controller on top is a digital oven controller, and it's in an MDF box painted with high-temp BBQ paint.

We added the wheels and bottom tray. It was a really fun and rewarding project, and the food is fantastic! I've even sold three briskets to friends and such.

The whole story of the rebuild is here:
http://www.pikespeakbbq.com/

Attachments

Images (1)
  • NewSmoker
Hi Brewbek,

It took about two months, but that was working only about one day a week.

All the racks, and the controllers, and the steel for the bottom are from a local junkyard. I've got at most $200 in it, and the bulk of that money was for stuff I bought new - paint, JB Weld, and the heater coils. I'm sure we've spent much more than that for brisket!

It was a really fun project, and I'd help anyone do another. You could easily make one from scratch, I'm sure.


i will have to find some 'open door' pics to add. but this, is the big rig. two sides, one has two racks, the other has one. each side, has a gas burner in the bottom, and a metal plate above the burner for wood. i can put 20 butts on one side, 30 on the other. thats a 400lb load. she was custom built, in 2000. it took a week, and tons of man hours, for a total cost of 18k. the grade of metal makes a huge difference in price. (my doors weigh in at over a hundred pounds) we had a stack fire, in july, two weeks after having it cleaned(i think maybe they used flammable solvents). the roof around the stack, and the ceiling and the stack theirselves are all new.
Last edited by Former Member
When I got my new smoker last week we had a nasty ice storm so I had to come up with a make shift cover for my first q. So I decided to build a permanent home for my 55. I probably went a bit overboard with the shingles and flue but I enjoy messing around with building things and since I recently retired I have plenty of time on my hands. This should keep my 55 out of the snow storm we have headed for us tomorrow.
Don

Attachments

Images (1)
  • 55-shed
quote:
Here's a pic of the finished product. You may notice some of the wifes garden tools in there as well. It was a way of selling her on the project. Give a little, take a little.

I've used it twice now and it works quite well.
Thanks for the ideas.


Hey Brewbek, what's that off to the left there? I've got one that looks awfully similar as well as the upright smoker. Fixin' to put them both on a trailer to haul around to "get togethers" and such. Big Grin Nice looking set up you got there. I was wondering if anyone else noticed that it looks like Cook Shack ought consider putting their smokers on a taller set of legs! Wink That Rubbermaid shed; do they sell accessories such as shelving and hang up hooks with it?
Last edited by Former Member
quote:
Originally posted by Pawclaws:
I was wondering if anyone else noticed that it looks like Cook Shack ought consider putting their smokers on a taller set of legs! Wink That Rubbermaid shed; do they sell accessories such as shelving and hang up hooks with it?


I agree with needing the taller legs. Before I was really only able to put a cookie sheet underneath it. It worked but could be messy when carrying it to the emptying ground. Now I have a deep glass dish that I use and it eliminates all of that problem.

Rubbermaid doesn't make any accessories for it as far as I know, but putting a shelf or hooks and hangers up are no problem at all. The walls are all hollow so I just put a plastic molley and screw into it and everything is staying put. I even have a paper towel hanger mounted on the ceiling which works out well and doesn't get in the way.
I really like brewbeks setup. Goin to get my own rubbermaid shed, except would have to kick out the wife. Guess thats why i'll allways be single. I am a fabricator at a soft drink producer so i have a good supply of stainless stock at work. My my the dreams i have had of the perfect setup. Plan on it being the complete setup for the smoker and grill, probably include a frig. Hate to run inside for a cold one while all the action is on the patio!
Colin.

IT'S FIVE O'CLOCK SOMEWHERE!
just set it up the other day 4x7 Rubbermaid still have some arranging to do need to label all the draws with different wood types and such but it's getting there did my famous fajita roll in it Sunday as always everyone loved it don't think the shed changed the flavor at all Smiler

Attachments

Images (1)
  • IMG_8649
Hello All,

I just received my 009 from Cabela's and am trying to figure out my setup. I like what RichH and Brewbek have done with the plastic sheds, and am more inclined towards the smaller one. I see RichH said to leave the chimney a couple of inches above the top vent or it will draw too much air. Does anyone else have experience with this? Brewbek, how far is your chimney above your vent - I can't tell from the pic. How much smoke are you all getting inside the shed? How has this setup been working for you. Thank you all for the information on this forum.
Welcome to the forum Capt Q.

I built a shed for my CS55 and used the same venting as Brewbek. My vent pipe sits 3-1/2 inches above my smoker vent and I've had no problems with this set up. I have noticed on cold days that condensation will drip from the vent pipe but it does not go into the smoker. I do get some smoke inside the shed but that smoke is leaking from around the smoker door and not from the vent. The leaking is almost gone now that my smoker is well seasoned.

Good luck and enjoy your cookshack.
Trucky, thanks for the reply. I have to really access the space I have on my deck to see what I have room for. I am now thinking of using a stand and set the 009 on it and use the cover when not smoking. It sounds like even in Alaska leaving the 009 outdoors under an eve, with the Cookshack cover, should work.

Right now I am seasoning it, according to the manual, with as fat of a piece of meat I could find on short notice, a 3.35lb pork shoulder. Over night. I will report on this when done. I hope it is an uneventful report. Eeker
quote:
Originally posted by Capt Q:
Hello All,

I just received my 009 from Cabela's and am trying to figure out my setup. I like what RichH and Brewbek have done with the plastic sheds, and am more inclined towards the smaller one. I see RichH said to leave the chimney a couple of inches above the top vent or it will draw too much air. Does anyone else have experience with this? Brewbek, how far is your chimney above your vent - I can't tell from the pic. How much smoke are you all getting inside the shed? How has this setup been working for you. Thank you all for the information on this forum.


I believe I recently saw a post by one of the guys at Cookshack that said the same thing. My recollection is that you leave 3" between the top of the smoker and the vent.
I tried to post pictures of our CS inside this thread, but it wound up in the Open Forum instead (http://forum.cookshack.com/eve/forums/a/tpc/f/7091028883/m/7011054274). The vent sets 3" above the top of the smoker, and I notice very little, if any, smoke that does not go up the vent. If the vent was closer than 3", I think getting a probe into the CS would be troublesome. At 3", the probe has to go up inside the vent before it will enter the hole on the CS.
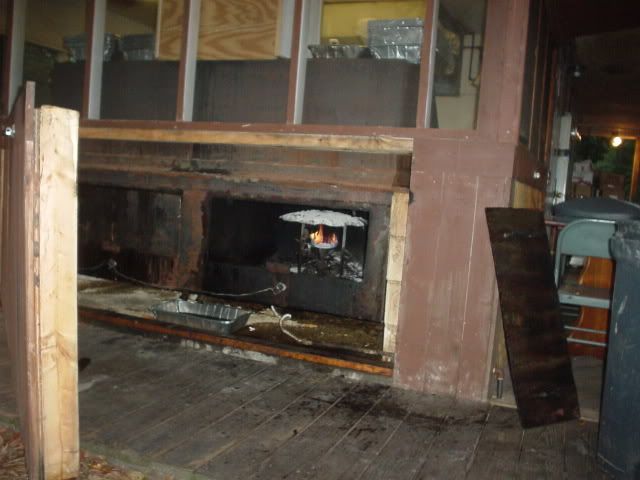
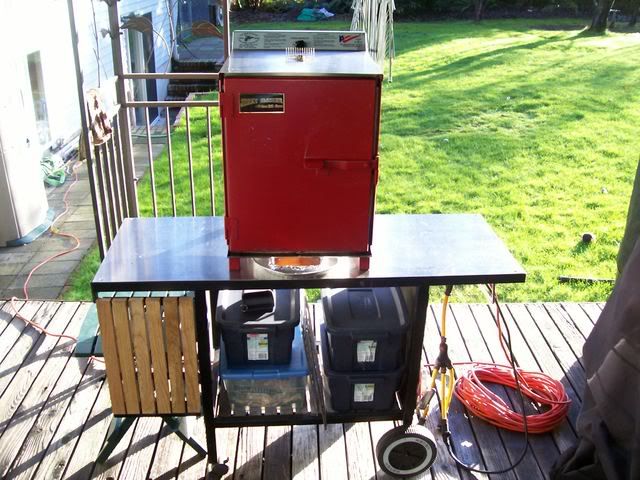
I have a homemade electric smoker,Next I am going to build a cold smoking unit. Currently I'm trying this theory out with a cardboard box.


It's a box within a box. The outside box has 2" of fiberglass insulation on all sides.


The heating element on the bottom is controlled by the thermocouple located just below the middle shelf.


The wood box sits directly on the heating element. Two cheap disposable foil pans catch all the drippings and grease, and can be used to hold water.


The temperature controller is located in an ammo box (since it's waterproof)along with an extra thermometer.


I added some extra switches to control a light, and shut off the heating element.


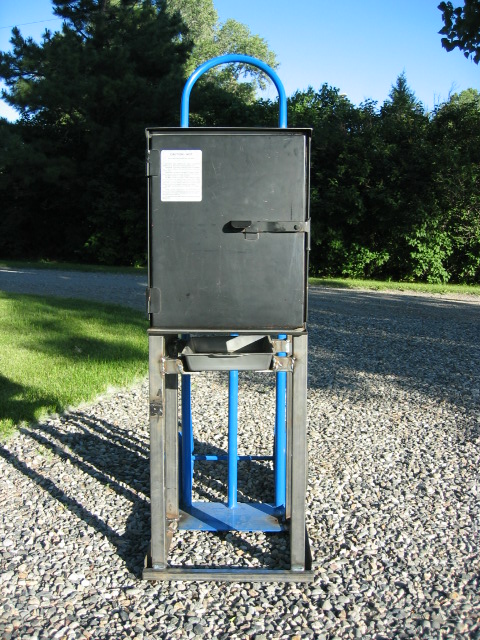
Recently I've been toying with the idea of cold smoking. For $20 in copper pipe, I'm testing it out with a cardboard box.


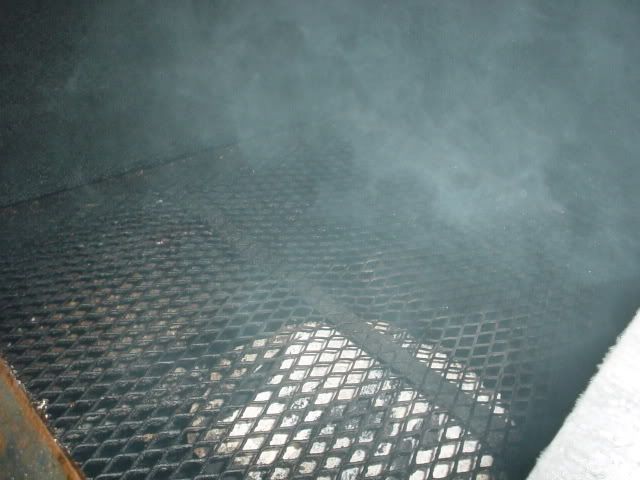
Plenty of smoke inside the box.


CarrollFamily:

Nice cabinet.... the only thing you might want to consider is the drippings you will get when you unload some meat from the smoker. You are going to want something in the front to catch that stuff and be easy to clean.

My first thought is to get a plastic cutting board and lay it across the first drawer when you are ready to unload. And a sheet of cardboard inside on the cabinet floor would help too... or a sheet of plastic.
Thanks QNorth. I am been trying to figure out something for the front. A plastic cutting board is a really good idea.
I hadn't even thought about the need to line the bottom of the cabinet. Thanks for that tip. I will come up with something and let you know.
Thanks for not making fun of my cabinet !
Hi everyone. I purchased my cookshack sm009 back in November of 08 after visiting my brother in Omaha. (Trucky1008) I've smoked a few pork butts, a brisket and even cooked a prime rib in my 009 so far. Tomorrow I plan on smoking some pepper poppers and some moinks. I don't have an attached garage to my house so I needed something to store my smoker in. I built this shed to house my smoker. I admit I somewhat stole the idea from my brother but of course I believe mine is better. Anyway good smoking and talk to you later.
Trucky9754

Attachments

Images (1)
  • smoker-1
My smoker setup is finally complete now that my shoulder allowed me to work on it. My wife and daughter did help with the heavy lifting.

I move the smoker under the patio cover close to an outlet when smoking, but the smoker sits next to my outdoor kitchen when I'm not using it, as shown in the picture. This could become my permanent location, but I haven't yet been willing to deal with the extension cord issue, which I would need to reach an outlet on the island.

The smoker is bolted to the Seville Rolling Cabinet and is handy, mobile, and sturdy. Due to the cabinet weighing 109 lbs with 5" large wheels, it is very stable and also provides nice storage. Smoked with the new setup yesterday, and it was a lot easier on the back now that the smoker rests higher.

Attachments

Images (1)
  • Picture
Last edited by pags
Pags:
How much area is there on that cart in front of the smoker? That is, if you take something dripping with juices out of it, where will the juices drip?

I need a good area in front of the smoker to keep things neat so I use a table but it's not movable.

And I assume the table isn't wide enough to allow the smoker to be turned sideways to get more room in front?
Moved from the Owners Forum

Being the cheapskate I am and lazy too, I came up with a way to move my cooker and get it up higher on the cheap. A $39 server cart from Harbor Freight. It's 24" x 36" & rated for #450. I drilled holes in the tray that matched the feet of the smoker. Between the smoker and the cart tray I added a scrap piece of 3/8ths plywood to reinforce the high grade chinese steel and to raise the unit above the lip of the tray enough for the door to swing. Installed the 4, 5/16th x 1.5 bolts and I'm more portable and have storage to boot.

Attachments

Images (1)
  • 08-14-09_1948
Frito looks great I have a cart similar to that one I use for my miter saw what you can do is unbolt the top shelf and flip it over and reattach it then you will have no problem with the lip to door clearance and you will raise the smoker about two or so inches and you will have a flat surface for platters and its will be allot easier to clean.
quote:
Originally posted by Dan2:
Frito looks great I have a cart similar to that one I use for my miter saw what you can do is unbolt the top shelf and flip it over and reattach it then you will have no problem with the lip to door clearance and you will raise the smoker about two or so inches and you will have a flat surface for platters and its will be allot easier to clean.


Ya know, when I was looking at the carts online before I bought mine local, I thought of doing just what you said. But.....I got home had a beer or 6 before starting assembly and forgot all about it. I'll probably leave it for now. I was going to put the cooker sideways to the cart, but when I roll the cart between my boat and truck under the shed it's pretty tight. It's easier to work from the narrow end. When the kid goes to college and I get *my* garage back I'll have a extra slot under the shed. I might flip the tray and turn the cooker then.
My son's stainless Smokette and custom built stand with stainless top, mounting "cage" so that smoker sits safely on the stand and can be easily removed (still on the casters) for tailgating etc. Plenty of room to the right for prep work and unloading the smoker, stainless top for easy clean up, and heavy duty framing and casters to last a life-time.

Also had the same stand built for my SuperSmoker Elite.

Six pictures to follow.

Special thanks to forum member DanQ from whom I purchased this Smokette for my youngest son's Christmas gift (believe DanQ upgraded to an AmQ, bought this one from him off of another website and then we figured out we were both Cookshack forum members, which made for a very easy transaction). Thanks Dan.

Attachments

Images (1)
  • Smoker_1
Here is my Amerique. I've noticed that others have used the same or similar setup. I bought the stainless steel table next to the cooker at Sam's Club. I already had the galvanized hot water heater stand.

Notice that my cooker is sitting on leveling legs.


Here are the legs you need for the latest edition of the Amerique, the ones with the black control panel on top. I don't know if the previous version had the same castor arrangement and size. These are 5/16-18 coarse thread, four inches long.


These are McMaster Carr part number 6111K371. It is a 5/16-18 zinc-plated 4 inch long swiveling leveling legs with a neoprene non-skid pad on the bottom. Each one costs $7.20. You can get them in stainless if you want, but they'll set you back over $15 per leg.

Last edited by Former Member
Thanks. I had to get it off the ground to save my back and knees. It's not fancy, but it does the trick.

I'm sure other people have used leveling legs to replace the casters, but I don't recall seeing them in other pics in this thread, so I thought I'd show a closeup and provide the McMaster part number.
quote:
Originally posted by SkipQ:
Here is my Amerique. I've noticed that others have used the same or similar setup. I bought the stainless steel table next to the cooker at Sam's Club. I already had the galvanized hot water heater stand.

Notice that my cooker is sitting on leveling legs.


Here are the legs you need for the latest edition of the Amerique, the ones with the black control panel on top. I don't know if the previous version had the same castor arrangement and size. These are 5/16-18 coarse thread, four inches long.


These are McMaster Carr part number 6111K371. It is a 5/16-18 zinc-plated 4 inch long swiveling leveling legs with a neoprene non-skid pad on the bottom. Each one costs $7.20. You can get them in stainless if you want, but they'll set you back over $15 per leg.


Thanks for the tip on the legs. Got mine overnighted and set up my new SM025 this afternoon!
Last edited by smokinmaineiac
I scoped out a sale at Harbor Freight a couple weeks ago (they post their upcoming sales well ahead of time) on a push cart that I thought would make for a nice stand for my AQ. I'm pretty sure I got the idea from someone here. I had already purchased the screw-in feet to replace the casters. Today I got the cart and assembled it, got everything set up. I'm going to like having the smoker up higher, easier to load and unload food!! Here is a pic off of my phone:


The bottom shelf has my wood chunks and a big roll of butcher paper that I use to line my prep table (which is to the left just outside the pic). On the top shelf next to the smoker are the racks that I've cleaned recently and a piece of shelving that I can use to set pans on, etc. The cart has a 3" edge all around so the smoker is sitting on a couple of 2x6's to prop it up a little more so the drip pan can be removed.
Didn't hesitate to spend the money for my new CS but couldn't bring myself to pay that much for the stand. Went to a restaurant supply place - lots of used stainless stuff, bought a used hospital cart for $50. Handy hubby mounted my smoker to it, per pic. Easy to move, has storage, and makes using the smoker lots easier. He had to remove some racks from the top - took him less than 1/2 hour. That's my idea of a good deal. Am loving my smoker and trying new recipes.

Attachments

Images (1)
  • IMG00022-20100920-0939_smoker_stand
Wanted to re-season the 150 this weekend and got a little carried away.
I started w/ just a 7lb PB and just started adding more and more.
I'm glad we had the extra shelves.


Top shelf is a pan of smoked baked beans
Next shelf is the PB
3rd is a baby back
and on the bottom shelf are 5 split breasts.

Add Reply

×
×
×
×
Link copied to your clipboard.
×